

How To Repair Drywall Tape On Popcorn Ceiling
To repair loose drywall tape on a textured ceiling, first, use a utility knife to cutting away the loose section of tape. Then, sand the surface area where the record was installed, being careful not to damage the drywall beneath. Once the surface area is prepared, install new tape and continue it in identify with two–three coats of joint compound. After the final coat of joint compound has hardened, sand the area. Finally, reapply texture to the area using a spray texture or past applying joint compound with a texture sponge.

Why Does Drywall Tape Come Loose From a Ceiling?
Drywall tape may get-go to peel off due to natural factors, such equally air humidity or your house settling over time. However, excess moisture from a roof leak may be the cause. If drywall tape has begun to pare off your ceiling, accept a closer look. If there are yellow or brownish water stains on your drywall ceiling, or if the layer of drywall is misshapen and moist, this may exist bear witness of a roof leak.
- Most peeling drywall tape is acquired by humidity or a business firm settling.
- In some cases, a roof leak may exist the cause of peeling drywall tape.
- Inspect your ceiling for water stains when removing and replacing drywall record, to determine if there is a roof leak.
If your roof is leaking, repairing drywall tape will merely be a temporary set. The h2o introduced past a roof leak will ruin your repairs and contribute to long-term impairment. If you have a roof leak, contact a professional for repairs.
7 Steps to Fix Drywall Tape on a Textured Ceiling
Repairing drywall record on a textured ceiling may seem like a daunting job. After all, how are y'all going to exist able to make a seamless fix that matches the surrounding ceiling? Don't fright. With the correct tools and techniques, you can brand a long-lasting drywall repair and texture your ceiling to lucifer the area around your work.
Get together Your Tools
Getting the job right requires the right tools. When fixing loose drywall tape on a textured ceiling, you lot will need the following:
- Ladder
- Drib fabric
- Protective goggles, gloves, and a grit mask
- Utility knife
- Sandpaper, in 120, 150, and 220 grit
- Drywall tape (either paper tape or mesh)
- 3-inch putty knife
- Joint compound, likewise known as drywall mud
- Spray-on ceiling texture OR a texturing sponge
With these simple tools and materials, you lot can repair your ceiling yourself. But follow the steps below to complete the repair job.
Remove Loose Tape
Using your ladder to attain the ceiling, cut away the loose tape with your utility knife. Cut the loose tape back to a bespeak where information technology is solidly attached to the ceiling, leaving no loose ends.
- Cut away the loose section of record with a utility knife.
- Remove the entire loose department without damaging the drywall beneath.
- Exercise not try to repair loose drywall tape by adding joint compound under the loose tape and pressing information technology back into place.
Removing damaged or loose tape is much more constructive than attempting to apply joint compound under the loose record and sticking it back into place. Trying to putty loose tape results in lumpy, uneven drywall seams that adhere poorly. Tape repaired in this fashion is likely to come up loose over again.
Sand the Area
After removing the loose tape, sand the drywall seam where the tape came loose. Use 120 grit sandpaper to initially sand the area, followed past 150 grit to smooth it. Make sure not to sand through the paper covering of the drywall. The goal hither is to remove whatever erstwhile joint compound on the drywall seam to create a clean surface for repairs.
- Use 120 grit sandpaper or this sanding block to sand the area where the tape was removed.
- Sand away any residual joint compound without sanding through the paper covering on the drywall.
- Information technology'south expected for some ceiling texture to exist removed during this process.
- Article of clothing center protection, gloves, and a dust-filtering mask whenever you lot are sanding drywall or articulation compound.
Don't worry if some of the ceiling texture around the seam is removed during the sanding process. We will repair and match the texture of the ceiling once the repair has been completed.
Install New Tape
For the simplest results re-taping the seam, use self-agglutinative mesh drywall tape. Tape over the exposed seam, making sure not to overlap the new tape with existing tape at either finish of the repair surface area. It's okay to take up to a i inch (2.5 cm) gap in between the end of the existing tape and the outset of the new tape.
- Use this mesh drywall tape to make taping the joint easier.
- Tape the exposed seam without allowing the new tape to overlap the existing tape.
- Use your putty pocketknife to spread joint compound over the record to accomplish a smooth surface.
Once the tape is in identify, spread a layer of joint compound over the tape. Work to accomplish a smoothen surface that blends the taped area seamlessly with the sanded expanse around information technology. Brainstorm with a thin layer of joint compound.
Use Multiple Coats of Joint Chemical compound
The all-time way to repair drywall seams is to work in increments. Don't attempt to repair the seam flawlessly with ane coat of articulation compound. Instead, utilize a glaze of joint compound and look 24 hours. Once 24 hours accept passed, sand the joint compound with 150 grit sandpaper and apply another coat. You lot may demand to repeat this process two–iii times to get a smooth seam.
- Lay a drop cloth on the floor below whenever yous are applying articulation chemical compound.
- Apply two–3 coats of articulation compound, building up the repair patch in increments.
- Wait 24 hours between coats, to allow information technology to dry out.
- Sand the surface area lightly with 150 dust sandpaper between coats, to foreclose buildup and imperfections that crave heavy sanding.
Past applying articulation compound a little at a time and sanding between coats, y'all build a smooth surface that blends with the surrounding ceiling. This makes the difference between a poor repair and a flawless one.
Sand Articulation Compound
One time you've completed your terminal coat of articulation compound, wait at to the lowest degree 24 hours before sanding. When y'all practise sand, begin with 120 grit sandpaper to remove whatsoever bumps or ridges, followed by 150 grit to smoothen the edges, and finishing with 220 grit to make a perfectly composite surface.
- Look 24 hours after your concluding coat of joint compound before sanding.
- First, sand with 120 grit sandpaper to remove ridges and large imperfections in the joint compound.
- Shine any grooves or gouges left by 120 grit sandpaper by using 150 grit.
- Make a perfect concluding terminate with 220 grit sandpaper.
Once you've completed this process, you volition be left with a professional, polish finish. This taped and floated seam will hold up for a long fourth dimension to come. Your ceiling is at present fully patched and ready for texturing.
Add Texture
To repair a textured ceiling, there are two easy options for the home DIYer. Showtime, yous tin use a spray product to quickly add texture to a portion of your ceiling. Alternatively, you can use a texturing sponge to utilise joint compound or a special texture patch production to the ceiling to create a textured wait.
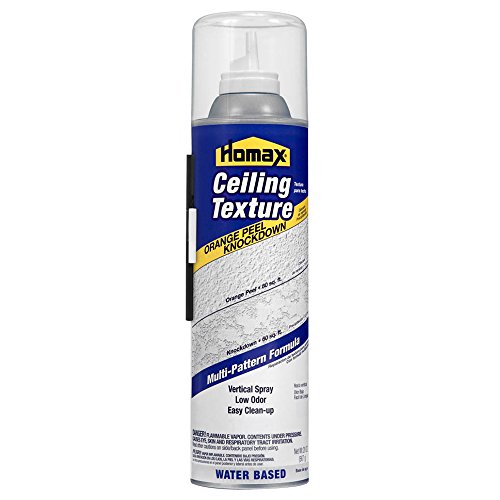
- This spray texture tin can be used to add texture to the ceiling after patching.
- Alternatively, you tin can use this texturing sponge to add texture to your ceiling.
- Dip i side of the texturing sponge in articulation chemical compound or a specialized texture patch product and dab information technology on the ceiling to recreate the surrounding texture.
- Utilize a drop material whenever y'all are calculation texture to a ceiling.
Nosotros earn a commission if yous click this link and make a purchase at no additional cost to you.
Calculation ceiling texture with a sponge takes some trial and fault. It's a skilful thought to examination it out on a slice of paper-thin before moving on to your ceiling. Experiment with dabbing texture on the cardboard with the sponge and using your putty knife to lightly scrape away excess. It's often a good idea to wait 15–20 minutes after applying the texture to scrape away the excess, as the production will be semi-hardened at this bespeak.

We earn a commission if you click this link and make a purchase at no additional price to yous.
How Do You Repair Drywall Tape on a Textured Ceiling?
If a portion of tape on your textured ceiling comes loose, you tin can repair information technology yourself. Here'south how:
- Cut away the loose portion of the tape.
- Sand the surface area to remove joint compound and texture in the surrounding area.
- Apply new drywall record and cover it with a coat of joint compound.
- Utilise additional coats of joint compound as needed to reach a seamless repair. Wait 24 hours between coats.
- Sand the repaired seam in your ceiling until it blends with the drywall on either side.
- Employ spray texture or a texturing sponge to repair the texture on your ceiling.
Information technology actually is that uncomplicated. With a few tools and simple steps, yous tin repair popcorn ceilings and lucifer any ceiling texture. All that's left from at that place is to apply a fresh coat of paint to friction match the surrounding ceiling.

Source: https://peppershomeandgarden.com/fix-drywall-tape-textured-ceiling/
Posted by: corumtrespearese.blogspot.com
0 Response to "How To Repair Drywall Tape On Popcorn Ceiling"
Post a Comment